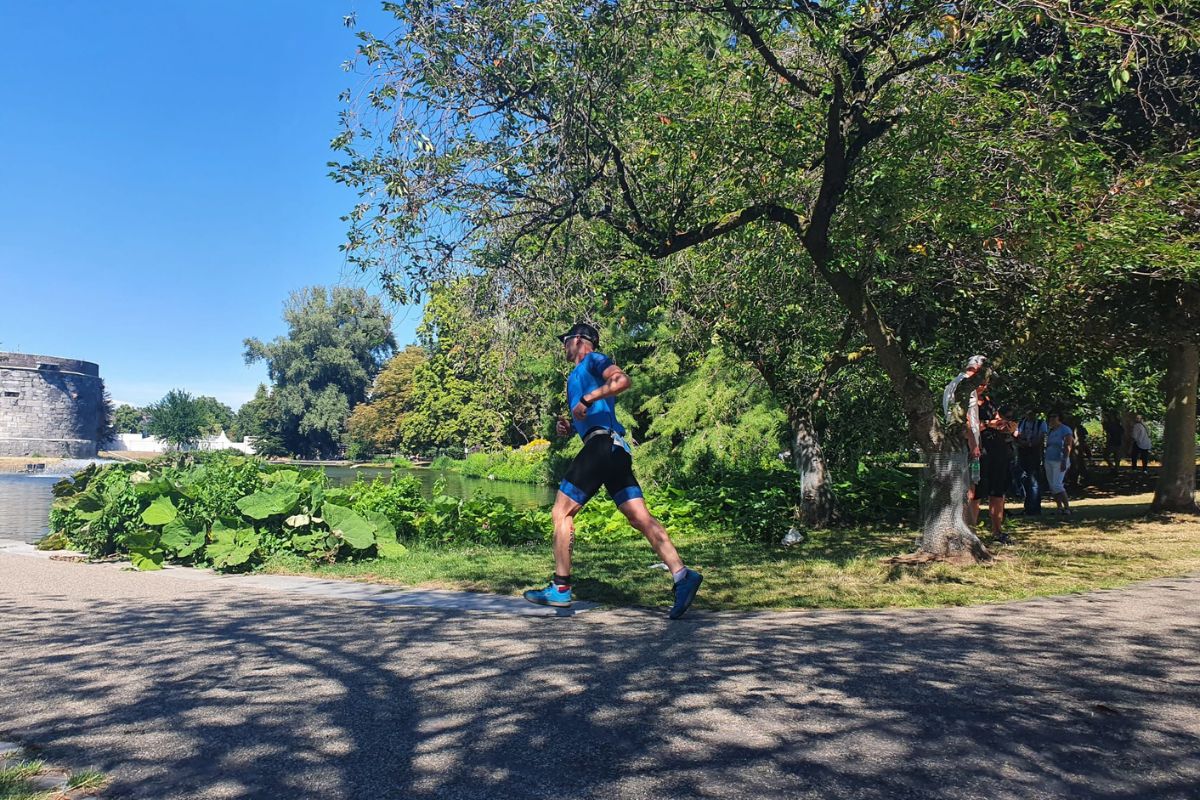
You can accumulate frequency, get strong, plan your fuel and gain a borderline fanatical knowledge of your kit.
There is no secret. Ultras need volume. However, they are not simply a marathon plan with more miles tacked on. An ultra-marathon is an entirely different beast, and it’s incredibly important to understand that fitness will only get you so far. Put simply, you cannot just train for an ultra. It requires a whole new level of attention to detail.
For me, preparing an athlete comes down to four key components.
The four components
1
Volume through frequency
Let’s use an example. Let’s say you have signed up to a circa 100 km UTMB mountain race. With marathon training, there is an old-school general rule that you build your long run up to about 30 minutes short of your expected time. Following this practice with an ultra would see you then need about 6 weeks’ recovery.
That is why the approach must be about building resilience and fatigue resistance, rather than simply aerobic endurance. In practice, this means high-frequency, low-intensity training. One way to achieve that is double-run days, that is a run in the morning and a run in the evening, with at least 6 hours of recovery between.
To be clear, do not do this every day, and ensure both sessions are low intensity. Your plan should include high-intensity work, but that should be separate to the double days. Otherwise it’s super simple: a short session in the morning, and a shorter session in the evening. I’d suggest building to a maximum of 1 hour in a peak-volume week for the morning run.
Start off doing this just once a week and, over the coming months, look to introduce one or two additional double-run days spaced out across the week. The obvious way to introduce this is running to work, if practical.
The goal of the high frequency, but not necessarily long duration, training is to build experience running on tired legs in a way that is sustainable over the length of your training build.
I mentioned planning in key weeks. For me this exercise in organisation is essential for any type of training plan, but especially for an ultra plan. Key weeks are where you lock in specific weeks in your calendar where training takes precedence. It might be a week off work, or it could be a conversation with the family that you need to be a bit selfish that week. Because they are locked in, key weeks are amazing for building the confidence that you will be ready for an event.
In ultra terms, this means selecting 4 to 6 carefully selected and separate weeks over the course of your training build, where you will significantly increase the week’s overall volume. Most of that comes from the back-to-back long runs at the weekend. These satisfy a similar purpose to the double-run days, but obviously on a grander scale.
The key weeks and big weekends are also an essential opportunity to test kit and your fuelling approach. Outside of those weeks you will still steadily build, but it is those breakthrough weeks where you begin to feel things coming together.
2
Strength, once you are past the trained distance
Strength isn’t something you hear too much talk of in the ultra world, other than the general acceptance that strength training is important to ultra athletes. However, strength training, in my opinion, should be an obsession for ultra runners. This is for one key reason. In an event, when you go beyond any trained distance, other factors than fitness begin to play an increasingly significant part in your ability to finish. Primary among them is the strength you have built, and the elevated ability to stay in one piece it brings.
I had a classic example of this, in a positive sense, with one of our ultra runners. He received a late entry to Marathon des Sables after another athlete unfortunately had to drop out. Whilst he was, and is, an accomplished runner, the 4 months we then had to prepare him for the toughest race of his life were not ideal. Particularly when others had been preparing, in a certain sense, for years.
Whilst we obviously did everything we could to prepare him in an endurance sense, we really focused on his strength training. The clearest evidence to me that our approach was successful was not just the fantastic result he had, but in the debrief he said something that really stuck with me. Whilst everyone else in his tent was dreading the big middle day, he was looking forward to it.
He was looking forward to it because he could see others falling apart, whilst he was holding strong, and that gave him enormous confidence he would make the hallowed finish line. He noted it was in the steep scrambling climbs that he noticed it the most, how much more physical strength he had than others around him.
3
Fuelling
There is currently a lot of hype around fuelling endurance events, which is great, because it is an area that can have such a big impact on an athlete’s health, not just their performance. In ultra running, though, particularly in unassisted or weight-limited events, fuelling plans become nearly as important as the running.
In a recent UTMB mountain ultra, it was estimated that one of our athletes expended over 10,000 kcal completing a 100 km event in just under 24 hours. A gel contains something around 120 kcal. Could you imagine consuming about 83 gels in 24 hours?
Fuelling an ultra-marathon is about understanding your needs, not just from a pure fuelling perspective, but also from the perspective of what you can actually carry and realistically keep down. Food choice and variety is paramount. In a 24-hour event you need more than just carbs, and avoiding taste fatigue from too much sugar isn’t just an inconvenience. It could contribute to a DNF if it impacts your motivation to eat, or to keep the food down.
It becomes a balancing act. You need a lot of carbohydrate. 100 to 120 g per hour is the current golden standard for those that have trained their gut for a marathon or Ironman, but for an ultra-marathon it is more important you can truly continue eating for 24 hours. That is where the key weeks I have mentioned above become so important. Not only do they build confidence, but they are the opportunity to try new foods and see what keeps taste fatigue at bay whilst giving you enough to burn.
4
Know your kit
I cannot overstate how important it is that you know your race kit like a loved one. Things will go wrong. It is inevitable in such a long event, and when you are sleep deprived, any actions need to be automatic, because your problem-solving skills will be severely diminished.
For me, I think most athletes find it easy to accept the training methodology and the need for a practised fuel plan. However, I find the need to practise with their kit is the harder nut to crack. Or perhaps, to put it more accurately, the will is there but sometimes life gets in the way, and it gets left too close to an event for the athlete to really know if what they have works, or is comfortable after 12 hours or more.
Invest in whatever you need early on. Train with it. Then put it through its paces properly in key back-to-back long-run weekends. Unfortunately, I have seen failure to do so really wreck what would otherwise be an epic result.
Breakthrough weeks
4–6
Separate weeks across the build. Locked in the calendar, not every weekend.
One 100 km
10,000 kcal
Estimated expenditure for one of our athletes, in just under 24 hours. At about 120 kcal a gel, that is roughly 83 gels. You are not going to eat that.
The key message
You cannot rehearse the whole distance.
You can accumulate frequency, get strong, plan your fuel and gain a borderline fanatical knowledge of your kit.
Build volume through frequency: easy doubles, then 4 to 6 separate key weeks with back-to-back long runs.
Once the race goes past the distance you have trained, the strength you have built is what keeps you in one piece.
You need a lot of carbohydrate, and you need to be able to keep eating it. Key weeks are where you find out.
Know the kit early. Sleep deprivation is a bad time to meet your pack for the first time.
Want this built into the plan?
If you want this fitted around the race, the rest of your training and the rest of life, book a free consultation or drop us an email.
A HIIT class is not strength training. Almost nobody is taught how to do it, and it is still a fundamental part of being an endurance athlete, whatever the discipline.
Strength training has so many benefits that you are probably already aware of, but if it helps, the way I think about it is as follows.
Why bother
1
Full range, not just load
Strength training encourages you to use your muscles and joints through their fullest range. This means you can improve your flexibility and mobility simply through lifting weights with good form. Exhibit 1: have you seen how insane the mobility of powerlifters is at the Olympics? Arse to grass stuff.
2
More muscle to train
Whilst strength training won’t directly enable you to pedal harder, run faster or move through water more efficiently, the increased muscle mass will give you more muscle to train for doing these things.
3
Balance and posture
The injury prevention benefits are massive. I’ve mentioned mobility, but unilateral (single arm or single leg) exercises also improve muscular balance and undo some of the postural damage swimming, cycling and running do.
4
Tissue and bone
Strength training encourages stronger soft tissue (ligaments and tendons) and discourages bone density reduction.
5
It feels good
Feeling strong is an incredible feeling. I can’t explain it beyond that, but feeling like you can lift or move stuff with confidence is just a lovely confidence builder.
6
Stay in the sport
Strength training basically helps you keep doing the things you want to do.
How to do it?
My athletes all get lovely, personalised training plans that are built after a review of their mobility, flexibility, muscular balance and so on, conducted in a dynamic screening. Nonetheless, I try to always make sure they understand the fundamentals, so if life throws in a curve ball, they know how to adapt. The fundamentals tend to look like the following questions.
How many reps and sets?
Reps and sets depend on the focus of the block. If you’ve just enjoyed an end of season break, or had a hiatus from strength training, you will need to prepare your body before you start to go heavy. That means something like 3 sets of 12 to 15 reps of relatively low load, whilst focusing on form and full range of movement.
From there it again depends on the focus of the training phase and the idiosyncrasies of the athlete. For a max strength phase, for example, probably something like 3 to 4 sets of 6 to 8 reps. The variations from there are endless depending on the objectives, but hopefully you see the point regarding manipulating the reps, sets, weights and the way an exercise is performed to match the goal.
How many weeks?
I really like my athletes to have at least 6 consecutive weeks before we change things up. I’ll typically give them an 8-week block to give a couple of weeks’ buffer and, depending on their consistency, assess where to go from there.
Strength programmes should be seen as stepping stones. You can only get to the next one when you’ve done enough of the last to make that step forwards.
How many times a week?
Once or twice a week is what most people can manage alongside their endurance training. If strength is seen as a real limiter, though, for instance a runner who struggles with lifting their knees, we might even get them doing three sessions a week out of season and drop run sessions to accommodate.
How long should it take?
Less than an hour, realistically. If it takes longer, the session needs to be tighter, or split into muscle groups, or upper body and legs.
I would also recommend timing your rest, to prevent you from procrastinating or wandering off to do other things. This is something I have to be really strict about, or I start tinkering with bikes.
How quickly to perform the exercises?
It does depend on the exercises and the training phase, but as a general rule, about three seconds on the way down (the eccentric phase), and two seconds on the way up (the concentric phase).
How low, or how far, to go?
Think in joint angles. You usually want to move the joint through its full range. If you are limited by mobility or flexibility, then I would suggest that is what you should be working on before you look to load the exercise further.
How much rest between sets?
There was actually some recent research on this, and they saw the best results with 3 minutes of recovery. Essentially, you want enough rest so you can repeat the exercise with real quality and stress the muscle or muscles in a maximal way. As mentioned above, time it, to keep you from drifting or, conversely, to avoid skimping on recovery.
What is supersetting?
This means performing two, sometimes three, exercises back to back, followed by a recovery period. Often an opposing pair, like chest and then into a back exercise (antagonistic supersets). Sometimes it could also be a compound lift and then an unrelated isolation exercise, such as a Romanian deadlift and then calf raises.
Do you really need to warm up?
So, so badly. You really need your muscles to be warm and your joints to be loose before you start lifting. Think about it like stretching a cold rubber band. It snaps. Roll it around a bit between your hands and suddenly it’s a lot more pliable and stretchy.
How do you progress?
Start by performing more reps within the prescribed range. If you can max out the range and the sets whilst maintaining good form, then look to increase the load.
As a general rule, only increase single-limb exercises by a maximum of 2.5 kg, and for bilateral exercises a maximum of 5 kg.
Alternatively, if mobility or flexibility is an issue for you, keep the weight constant and only look to increase it if you are confident that your technique is spot on. My athletes all know they can send me videos for comment, but if you don’t have that luxury, performing in front of a mirror, or filming yourself, and remembering the point above about joint angles, should help you assess.
Each week, though, you should be looking to make some form of step forwards based on the above.
Is HIIT or circuit training good?
For an endurance athlete? Definitely not. I completely understand that strength training isn’t everyone’s cup of tea, and going to a class can help massively with motivation. So if it’s the difference between doing some form of strength work or doing nothing, then do book that class.
However, it’s important to understand what HIIT training is. It’s just more cardiovascular training on top of your endurance training load.
Strength work is about testing your ability to lift or move things. So it should be done with focus, and it should stress the capacity of your muscles to produce power.
What if you don’t enjoy strength training?
If you struggle for motivation, I would argue the greatest motivator is truly understanding why you are doing something, and ensuring you have targets to achieve.
For instance, do you suffer from Achilles tendinopathy? Then those calf raises are going to introduce length to that Achilles and really encourage it back to health. They’ll hopefully also improve ankle mobility and stability. That exercise is going to help make the injury a thing of the past.
The key message
Strength training helps you keep doing the things you want to do.
Once or twice a week, under an hour, for at least six weeks before you change it.
Full range and good form first. Then load: 2.5 kg on one limb, 5 kg when both are working.
Rest about three minutes, and time it, so the next set is still a real effort.
Warm up. Cold tissue is a cold rubber band.
A HIIT class is extra cardio. It is not the strength session.
Want this built into the plan?
The reps, the lifts and the bits that match your sport are easier to get right once someone has actually watched you move. Book a free consultation or email us.
endurance athletes
Canonical: https://riak.fitness/how-to-strength-train/
IMAGES
One hero image only. Same 16:9 frame as the other training articles.
DEPLOYMENT:
1. WP Admin → Posts → Add New
2. Custom HTML block → paste this file
3. If the theme also prints the post title, hide it so the page has one h1
4. Tick the Articles category so it appears in the library
5. Fill in the SEO fields above
6. Preview mobile and desktop, then publish
–>
Training article
How to strength train as an endurance athlete
Short, personal, and heavy enough to matter
StrengthEnduranceMobilityInjury
A HIIT class is not strength training. Almost nobody is taught how to do it, and it is still a fundamental part of being an endurance athlete, whatever the discipline.
Strength training has so many benefits that you are probably already aware of, but if it helps, the way I think about it is as follows.
Why bother
1
Full range, not just load
Strength training encourages you to use your muscles and joints through their fullest range. This means you can improve your flexibility and mobility simply through lifting weights with good form. Exhibit 1: have you seen how insane the mobility of powerlifters is at the Olympics? Arse to grass stuff.
2
More muscle to train
Whilst strength training won’t directly enable you to pedal harder, run faster or move through water more efficiently, the increased muscle mass will give you more muscle to train for doing these things.
3
Balance and posture
The injury prevention benefits are massive. I’ve mentioned mobility, but unilateral (single arm or single leg) exercises also improve muscular balance and undo some of the postural damage swimming, cycling and running do.
4
Tissue and bone
Strength training encourages stronger soft tissue (ligaments and tendons) and discourages bone density reduction.
5
It feels good
Feeling strong is an incredible feeling. I can’t explain it beyond that, but feeling like you can lift or move stuff with confidence is just a lovely confidence builder.
6
Stay in the sport
Strength training basically helps you keep doing the things you want to do.
How to do it?
My athletes all get lovely, personalised training plans that are built after a review of their mobility, flexibility, muscular balance and so on, conducted in a dynamic screening. Nonetheless, I try to always make sure they understand the fundamentals, so if life throws in a curve ball, they know how to adapt. The fundamentals tend to look like the following questions.
How many reps and sets?
Reps and sets depend on the focus of the block. If you’ve just enjoyed an end of season break, or had a hiatus from strength training, you will need to prepare your body before you start to go heavy. That means something like 3 sets of 12 to 15 reps of relatively low load, whilst focusing on form and full range of movement.
From there it again depends on the focus of the training phase and the idiosyncrasies of the athlete. For a max strength phase, for example, probably something like 3 to 4 sets of 6 to 8 reps. The variations from there are endless depending on the objectives, but hopefully you see the point regarding manipulating the reps, sets, weights and the way an exercise is performed to match the goal.
How many weeks?
I really like my athletes to have at least 6 consecutive weeks before we change things up. I’ll typically give them an 8-week block to give a couple of weeks’ buffer and, depending on their consistency, assess where to go from there.
Strength programmes should be seen as stepping stones. You can only get to the next one when you’ve done enough of the last to make that step forwards.
How many times a week?
Once or twice a week is what most people can manage alongside their endurance training. If strength is seen as a real limiter, though, for instance a runner who struggles with lifting their knees, we might even get them doing three sessions a week out of season and drop run sessions to accommodate.
How long should it take?
Less than an hour, realistically. If it takes longer, the session needs to be tighter, or split into muscle groups, or upper body and legs.
I would also recommend timing your rest, to prevent you from procrastinating or wandering off to do other things. This is something I have to be really strict about, or I start tinkering with bikes.
How quickly to perform the exercises?
It does depend on the exercises and the training phase, but as a general rule, about three seconds on the way down (the eccentric phase), and two seconds on the way up (the concentric phase).
How low, or how far, to go?
Think in joint angles. You usually want to move the joint through its full range. If you are limited by mobility or flexibility, then I would suggest that is what you should be working on before you look to load the exercise further.
How much rest between sets?
There was actually some recent research on this, and they saw the best results with 3 minutes of recovery. Essentially, you want enough rest so you can repeat the exercise with real quality and stress the muscle or muscles in a maximal way. As mentioned above, time it, to keep you from drifting or, conversely, to avoid skimping on recovery.
What is supersetting?
This means performing two, sometimes three, exercises back to back, followed by a recovery period. Often an opposing pair, like chest and then into a back exercise (antagonistic supersets). Sometimes it could also be a compound lift and then an unrelated isolation exercise, such as a Romanian deadlift and then calf raises.
Do you really need to warm up?
So, so badly. You really need your muscles to be warm and your joints to be loose before you start lifting. Think about it like stretching a cold rubber band. It snaps. Roll it around a bit between your hands and suddenly it’s a lot more pliable and stretchy.
How do you progress?
Start by performing more reps within the prescribed range. If you can max out the range and the sets whilst maintaining good form, then look to increase the load.
As a general rule, only increase single-limb exercises by a maximum of 2.5 kg, and for bilateral exercises a maximum of 5 kg.
Alternatively, if mobility or flexibility is an issue for you, keep the weight constant and only look to increase it if you are confident that your technique is spot on. My athletes all know they can send me videos for comment, but if you don’t have that luxury, performing in front of a mirror, or filming yourself, and remembering the point above about joint angles, should help you assess.
Each week, though, you should be looking to make some form of step forwards based on the above.
Is HIIT or circuit training good?
For an endurance athlete? Definitely not. I completely understand that strength training isn’t everyone’s cup of tea, and going to a class can help massively with motivation. So if it’s the difference between doing some form of strength work or doing nothing, then do book that class.
However, it’s important to understand what HIIT training is. It’s just more cardiovascular training on top of your endurance training load.
Strength work is about testing your ability to lift or move things. So it should be done with focus, and it should stress the capacity of your muscles to produce power.
What if you don’t enjoy strength training?
If you struggle for motivation, I would argue the greatest motivator is truly understanding why you are doing something, and ensuring you have targets to achieve.
For instance, do you suffer from Achilles tendinopathy? Then those calf raises are going to introduce length to that Achilles and really encourage it back to health. They’ll hopefully also improve ankle mobility and stability. That exercise is going to help make the injury a thing of the past.
The key message
Strength training helps you keep doing the things you want to do.
Once or twice a week, under an hour, for at least six weeks before you change it.
Full range and good form first. Then load: 2.5 kg on one limb, 5 kg when both are working.
Rest about three minutes, and time it, so the next set is still a real effort.
Warm up. Cold tissue is a cold rubber band.
A HIIT class is extra cardio. It is not the strength session.
Want this built into the plan?
The reps, the lifts and the bits that match your sport are easier to get right once someone has actually watched you move. Book a free consultation or email us.
When to trust it, when to ignore it, and how to use it with power and perceived effort
Heart rateThresholdPacingEndurancePower
Training to heart rate is a bit of a lost skill. Power meters did not make it useless. They just changed how we use it.
The downside of heart rate is the lag. Intensity changes, and the number on the screen takes a while to catch up. On a short effort that lag is the whole story and the interval is often finished before heart rate has levelled out at anything you can trust.
You also get the opposite problem on the way down. Heart rate spikes, then sits there. It does not fall as quickly as the effort did. So, you finish a rep, look down, and the number is still telling you about the work you have already done.
That is why I see heart rate as having quite a limited real-time use case in training. Anything under about five minutes is usually over before heart rate has become a useful target. The delay is not a fault in the tech; it’s a physiological idiosyncrasy.
Power is considered more of a real-time metric, but it’s not perfect. If we consider an all-out sprint for example, you cannot usefully stare at it, and less likely do anything about what you see. You are executing the effort, not managing a metric. Power as something you watch and adjust really comes into its own from about 60 seconds onwards.
Decoupling rate
Once the effort is long enough for the number to settle, however, heart rate becomes very useful. Particularly when you have a power meter as well.
For instance, a comparison I like is the decoupling rate. In a long ride where you hold a steady power, it is possible to see what your heart rate does in response. Early in a long ride the two should sit in a fairly stable relationship. Later, heart rate often climbs while power stays consistent. That rise — heart rate decoupling from power — is helpful information.
Over months, a smaller drift at the same sort of ride is one sign that fitness is moving the right way. In contrast, a drift that is bigger than usual for you could potentially signal fatigue or illness. Recent work on long rides has tied the same drift to something more specific than a vague sense of fading. As heart rate climbs against a steady power, the power you can still hold at an easy-to-steady endurance intensity tends to fall with it. The goalposts move during the ride. Heart rate is often the first thing that demonstrates this.
Do not read every rise as fitness, fatigue or illness, though. Heat, dehydration and a poor night’s sleep can push heart rate up at the same power. So could a normal long effort in its own right. The rate of decoupling number (PWR:HR), therefore, is a prompt to look at the rest of the picture, not a diagnosis on its own.
Observing heart rate during intervals
If you do not have a power meter, heart rate is still super helpful. In fact, I would really encourage you to get comfortable using heart rate, power and perceived effort as interchangeable. When they agree, you can be confident. When they do not, that disagreement itself is useful information.
During 5-minute plus intervals, though, it is possible to use heart rate in a similar way to how you would use power and power training zones. Put simply, is your heart rate in the right range during the interval to stress the energy system you are looking to target with that interval. For this to work, of course, you need to know your heart rate zones and the ranges within which your heart rate must settle to be correctly hitting the right energy system. The starting point for this is gauging your threshold heart rate.
The field test I tend to use the most is a 30-minute time trial on a turbo, or an outside 10-mile time trial if you can persuade an athlete to sign up to a local race.
Ensure you use a heart rate strap rather than a wrist or arm strap. Optical heart rate monitors used by watches and wrist monitors are useful for tracking long-term patterns but, IMO, useless when you need accurate workout-based numbers. Heart rate straps are still the gold standard. On the date of writing this article, I completed a tempo run and during a 5-minute 5k-paced effort, there was a 20 bpm difference between the data from my chest strap and the optical heart rate monitor on my watch.
Warm up properly — at least 10 minutes, with some accelerations to get the fast-twitch muscle fibres going. Then ride 30 minutes as hard as you can genuinely sustain. We ignore the first 10 minutes and take the average heart rate across the final 20 minutes, minus 6 bpm, to give us a rough threshold heart rate.
A lab review of the 30-minute test, in cyclists and triathletes, found the last-20-minute heart rate repeatable, and also a little generous: on average it sat about six beats above a laboratory lactate threshold. Hence, we minus 6 bpm from the 20-minute average.
Warm up, then commit
At least 10 minutes, with some efforts. Build into the 30 minutes, as it’s a long time at your max, and once within sight of the end, finish hard.
Ignore the first 10
We ignore the first 10 minutes, as your heart rate will still be climbing.
Average the last 20
We average the last 20 and minus 6 bpm. That average is your working threshold heart rate. Rough, repeatable, and good enough to build heart rate zones from.
Then get acquainted with it
Knowing the number is the start. The useful part is using threshold heart rate and heart rate zones alongside whatever else you have. Power, if you have it. Perceived effort, always.
For instance, my threshold heart rate usually sits around 156 bpm. If I am into the 160s, I know I am working my VO2max. If I then go above about 165, I know I am shifting into the anaerobic systems. It really is as simple as that. Your numbers will not be the same as mine, but the habit should be the same: know what “around threshold” feels like, know what “a few beats over” means, etc.
It is just as useful on race day
The same anchor works for long events. These are my numbers, against a threshold of around 156 bpm.
70.3, on the bike
~140
I want the lower end of zone 3. Hard enough to race. Not so hard that the run starts from a hole.
Ironman, on the bike
130s
Mid to high 130s. That is the middle to the top of zone 2 for me. There is a long run still to come.
There is an important practical point here for our triathletes. In training, hold the power and let heart rate tell you what the effort is becoming. In a long race, cap the heart rate and let the power come down. Defending a power number while heart rate climbs through the zones is how a good ride becomes a bad run.
Let it change the session
Heart rate should also be an important factor in deciding whether today’s session should happen as written.
A common picture: the warm-up feels awful. The legs are heavy. Perceived effort is higher than it should be for the work in front of you. Then you look at heart rate. If it is much higher than normal for that effort or power, or much lower, something is up. The mismatch is the signal, not the direction of it.
If you have earned that fatigue — a big block, short sleep, sessions stacked up — scale the day down. Intensity, duration, or both. If you should not be that tired, because you have just had a recovery day or a run of easier sessions, it can be the first sign you are coming down with something. Heat, dehydration and a bad night can also influence the picture. The point is not to diagnose yourself from a warm-up, but the point is also not to force the session when heart rate and effort have both told you the day is different.
The key message
Heart rate is a poor real-time guide for short work, and a very good one once the effort is long enough to settle.
Under about five minutes, do not chase heart rate. It has not caught up yet.
Over about five minutes, watch it. Preferably from a chest strap, and alongside power and perceived effort.
Get a threshold heart rate from a 30-minute effort, using the last 20 minutes minus 6 bpm, and judge the rest of your riding against that number.
On long races, stay under threshold. Cap heart rate and let power fall, rather than the other way round.
If the warm-up heart rate and the warm-up effort disagree with what you expected, consider scaling the session.
Want the number built into the plan?
Threshold heart rate, the zones around it, and the sessions where it should actually be the guide — that is part of the coaching, not a one-off test. Book a free consultation or email us.
Heat can be one of the biggest performance limiters in endurance sport, but the good news is that heat tolerance is trainable.
Whether you’re preparing for a marathon in Spain, an Ironman in a tropical climate or a cycling event during a European heatwave, exercising in hot conditions places additional demands on the body. Heart rate rises, sweating increases, cardiovascular strain increases, and the same pace or power can feel considerably harder.
With repeated exposure to heat, the body makes a series of adaptations that allow you to regulate temperature more effectively. In an ideal world, this would mean a couple of weeks somewhere exotic in the lead-up to a major race, but for most of us, this isn’t realistic.
Fortunately, research shows that there are several practical ways of stimulating heat adaptation without booking a flight.
What is heat acclimatisation?
Heat acclimatisation is the process of repeatedly exposing the body to heat, resulting in physiological adaptations that improve tolerance to exercising in hot conditions.
The adaptations are remarkably comprehensive. They affect the cardiovascular system, sweating response, skin blood flow, fluid balance, perception of effort and the body’s ability to dissipate heat.
What actually changes when you acclimatise?
1
Your cardiovascular system becomes more efficient
One of the early responses to heat acclimation is an expansion of plasma volume (the fluid element of your blood). This means blood pressure and cardiac output (pumping blood around) can be better maintained while blood is simultaneously being directed towards the skin. Once there, heat is dissipated through sweat, which is essentially taken from your blood plasma, and when the sweat evaporates, heat escapes with it.
As acclimation develops, athletes typically experience:
Lower heart rate at a given workload
Increased stroke volume
Improved cardiovascular stability
Better maintenance of blood flow during exercise
This is important because exercising in the heat creates a competition for blood flow, and heat acclimation helps the cardiovascular system manage this challenge more effectively.
2
You start sweating earlier and more effectively
Sweating is one of the body’s most important cooling mechanisms.
With heat acclimation, the body generally begins sweating at a lower core temperature and produces more sweat during exercise, therefore dissipating heat more effectively.
Heat acclimation also changes the composition of sweat. The sweat glands become better at conserving sodium, meaning sweat generally becomes more dilute and better avoids drifting towards hyponatremia (low blood-sodium levels), a serious condition that many misinterpret as dehydration.
3
Your body becomes better at controlling core temperature
Following heat acclimation, athletes typically experience lower core and skin temperatures during a given exercise workload.
Earlier sweating and improved skin blood flow allow heat to be transferred away from the body’s core more effectively.
The body therefore stores heat more slowly, which helps delay the point at which rising temperature becomes a major limitation to performance.
4
Skin blood flow improves
Heat acclimation improves the body’s ability to increase skin blood flow and therefore improves its capacity to transfer heat from the core towards the body’s surface.
This contributes to the reduction in cardiovascular strain seen after acclimation.
5
Fluid regulation improves
Heat acclimation triggers adaptations to the production of hormones such as aldosterone and antidiuretic hormone, which help the body retain both water and sodium.
The result is improved fluid balance and a greater ability to maintain cardiovascular function during prolonged exercise in the heat.
6
The heat feels easier
Not all adaptations are physiological.
Heat acclimation can also improve thermal comfort and reduce perceived exertion during exercise in hot conditions. Reducing that perceptual strain can make it easier to maintain an appropriate pace or power output, rather than backing off prematurely.
How long does heat acclimatisation take?
A significant proportion of the adaptations to heat occur during the first week of repeated exposure, with further adaptations developing during the second week.
Consensus recommendations generally suggest 1–2 weeks of repeated exercise-heat exposure for athletes preparing for competition in hot conditions. However, with life being as it is, and training adaptations always needing consistency, I would suggest starting at least 4 weeks out from your event. That gives you time to get the logistics of exposure set up and to get into a habit.
How can you acclimatise without going abroad?
There are several ways of creating a heat stimulus without spending two weeks training overseas.
1. Train in the heat
Exercise in a genuinely hot environment and allow your body temperature to rise while maintaining a controlled training intensity. Traditional research protocols have commonly used temperatures around 30–40°C, with exercise performed at a low to moderate intensity.
It is really important that your training truly is at a lower intensity, because trying to carry out your normal high intensity sets is a recipe for heat distress rather than gently encouraging adaptations, which is our goal. Let the heat exposure do its job. You will have other opportunities for that smashfest.
Training in the heat can mean being out in the heat of the day in the summer, or it could mean indoors training in a warm room. The latter also requires care. Make sure the room you are training in is properly ventilated, because as your sweat evaporates it will expel humidity into the air, and without ventilation that humidity will create a lower oxygen environment. Trust me, you do not want to faint whilst still clipped into a bike on a turbo trainer. Messy…
2. Exercise first, then use passive heat
For the reasons above, this is personally my preferred method for my athletes.
Complete your normal training session in a temperate environment, then immediately expose yourself to heat. Examples include:
Hot-water immersion
Sauna
Other forms of passive heat exposure
The advantage is that you can maintain the quality of your training session without the heat compromising your power, pace or technique.
The exercise raises your core temperature first. Passive heating then extends the period of thermal strain, providing an additional heat stimulus.
Hot-water immersion
40°C
Research has commonly used water at approximately 40°C for around 30–40 minutes following exercise.
Sauna
15–40 min
Research protocols vary, but studies have commonly used approximately 15–40 minutes of post-exercise sauna exposure.
The evidence suggests that post-exercise sauna and hot-water immersion can produce broadly similar heat-acclimation adaptations when used as part of an appropriate programme.
With my athletes, we have found that about 15 minutes of post-strength-training sauna exposure has been quite effective. Logistically, because many gyms have a sauna, it is the method most likely to be repeated.
I must stress, the goal isn’t to see how long you can stay in the sauna. The goal is to provide a repeatable thermal stimulus without compromising your overall training programme.
Do you need to train in the heat every day?
The research shows that repeated exposures are important, but protocols vary considerably.
Traditional exercise-heat-acclimation programmes often use daily exposure for around 7–14 days, while passive heating studies have used anything from several consecutive days to around three sessions per week.
I would prioritise consistency and repeatability over trying to maximise heat exposure at every opportunity. Whatever method you go for, it needs to fit within your training programme without compromising your progress.
In practice
A very simple protocol
Recently with an ultrarunner, we followed a very simple protocol:
Sauna after every strength session
1–2 low-intensity treadmill runs in the gym, where it probably wasn’t quite 30–40°C, but warm enough
1 run at the weekend in the heat of the day, but on relatively short loops around where he lived so he could stop to grab fluids or a quick break in the shade. His exposure was still a stimulus and not a gruelling slog
In total he probably had 5 days of exposure per week over a 4-week period. He then went and smashed the Marathon des Sables, even getting stronger over the 6 days!
When should you do your heat acclimation?
As mentioned above, I really like my athletes starting a heat acclimation protocol at least 4 weeks out. The research might indicate adaptations within 14 days, but let’s face it, it’s yet another thing to be on top of and the logistics of following a protocol aren’t always easy. So for me, 4 weeks gives us time to work out the kinks.
Do remember though, if you are travelling to the hot environment before the race, the time spent there can also provide an opportunity for further acclimation. If it is a major event, something like Kona or another world champs, going out a week before can do wonders for your heat acclimation as well as just your general ability to relax in the environment. Don’t underestimate what feeling relaxed in your environment can do for your performance.
How can you tell if you are adapting?
The easiest way is to have at least one low-intensity session that is repeated over the course of the protocol, and to monitor your heart rate closely. Hopefully, in time, you’ll see:
Lower heart rate at the same workload
Lower perceived exertion
Earlier onset of sweating
Increased sweat rate
Improved thermal comfort
Lower body temperature responses
The key message
You don’t need to fly to a hot country to prepare for a hot race.
Repeated heat exposure at home — particularly exercise followed by passive heat exposure such as a sauna or hot-water immersion — provides a practical alternative, and can produce many of the physiological adaptations associated with heat acclimation.
The most important principles are:
Start early enough to accumulate repeated exposures and to work out the logistical kinks — about 4 weeks out.
Use low-intensity training when the session focus is the heat stimulus.
Consider post-exercise passive heat exposure to preserve training quality. After strength sessions would be my recommendation, for the ease of access to a sauna or jacuzzi.
Have at least one low-intensity session you repeat, and keep a close eye on your heart rate to give you a benchmark of how well your body is adapting.
Want this built into the plan?
If you want this fitted around the race, the rest of your training and the rest of life, book a free consultation or drop us an email.
Ultra-runner Tom Charlick on racing the desert with RIAK run coaching
Marathon des SablesUltra-runningDesertRecoveryCoaching
270km · 7 days · 6 stages · ~1,500 competitors
How hard was it?
Ultra-running suffers from a bit of delusion on the concept of difficulty — it is like I am somewhat numb to it. I think I put that down to how I approach these events in terms of my preparation, the expectation that things can and will go wrong — you quite literally have to think on your feet to solve problems that could ultimately be race ending — and most importantly — I want to enjoy every moment of whatever it is I am doing, even if it sucks.
It’s important for me to share some of this to add a bit of context to what I am going to say. To bring it back and actually answer the question — this is obviously a very physically and mentally demanding event, with a huge number of variables to contend with.
People laugh when I say the running was the easy bit. I know I’m somewhat joking but I do mean that. I feel the real confidence came from deconstructing the event into its core pieces, practicing each aspect of this, and still being open to all of my planning being tipped on its head. I read every book I could get my hands on, race reports dating back 10 years, podcasts — anything with MDS in the title — I’ve probably looked at it.
I wanted to get a glimpse into this world, and work with Rich to map out the different challenges so I could practice these in isolation. A personal favourite was eating freeze dried expedition meals on a trading floor in London to taste them all ahead of the race. That definitely raised some eyebrows.
Sleep and recovery
After every stage, I was religious about this routine.
After finishing (took turns with another guy being first back in the tent) in true MDS tradition, it was our honour to clean the tent rug from sand and stones for the rest of the guys. The rugs weighed a tonne, and after running for hours and it now being peak sunshine during the day, this was a workout in itself.
I’d fill one of my freeze dried meals with water, add 2x Knorr stock cubes to get salt back into me, and leave this in the sun for 20 minutes to rehydrate while I lay with my legs up on my backpack to try and drain some fluid away and just generally relax, then get my food in ASAP.
Next, I had the pleasure of going to the medical tent to drain my 9 blisters with syringes (I had become emotionally attached to them by the end of the week), and inject them with iodine to prevent infection. As someone who hates needles, this was a form of self inflicted torture. I’d then go back in the evening to re-drain them and tape them up ready to go for the next day. I deliberately did this in two separate trips, to let them breathe during the day and so I had two opportunities to clean my feet and hands (I had become obsessed with this).
If they got infected the medical staff could pull me from the course. At the end of the 100km day, I had to get a doctor to treat my feet because I was so cooked that you could have hit me over the head with a cricket bat and I wouldn’t have realised. I actually fell asleep on the treatment bed as he was doing all of this and he woke me up when I was good to go and hobble (sleepwalk) back to my tent.
After the med tent, went to get my 5L water ration for the rest of the day. Remaining sunlight hours consisted of laying horizontal with feet elevated, occasionally getting up to stretch the legs and cheer the rest of the guys back into the tent.
I’d then get all my kit sorted for the next day, Phoenix bars broken up and prepped into zip lock bags and put in my waist belt pockets, breakfast laid out for the following morning and everything else cleared away so I could just be on autopilot.
I observed a lot of people faffing around, or delaying eating so they could go to the med tent (often for hours) which I think is really sub-optimal. Your body is completely catabolic at that stage and will start to break down muscle for energy due to the calorie deficit if you are not careful.
How well did you do?
Going into this event, I had no real idea what to expect, or how my body would react to the heat, the full pack weight and the lack of sleep, but I knew I had made the most out of my training (which was a bit compressed, on the back of completing Wildstrubel 110 in September, and coming out of that injured which I had to manage for a couple of months).
I completed the Pilgrims Challenge in February, which was a brilliant prep race and many other MDS hopefuls were also there practicing with their kit, and getting some good volume in the legs. It totals 110km and ~2,500m D+ split in 2x equal stages on the Saturday and Sunday. I managed to place 12th overall in this, and my times on each day were only ~10 seconds apart. I have no idea how I managed to be so consistent but I felt really strong and was holding back, treating it as a training run. Quietly confident, but was not counting my chickens yet.
For the MdS itself, I managed to place in the top 15% overall, just outside the top 200 of ~1,500 in total. This was quite a surprise to me — I was never doing the event “just to complete” but at the same time, I wasn’t pushing for a particular position either. I knew I was in good form, but I was just doing my own thing, and trying to get stronger each day, and finish each stage feeling fresh and fired up ready to go for the next. No matter where I would start the day (often further back with my tent mates), I’d still end up finishing with the same faces towards the end of each day — I guess the order of everything just naturally works itself out.
Overall finish
Top 15%
Just outside the top 200 of roughly 1,500 starters.
Pilgrims Challenge
12th
110km prep race in February — ~10 seconds between day-one and day-two times.
What worked from the training?
Back to back long trail runs — the bread and butter of pretty much any ultra event. This forms the core base fitness and leg strength that you can then bolt event specific workouts on top of.
Short hill reps (30–60s) — I cannot lie, I was somewhat sceptical when Rich was focussing on these so much (some weeks doing 2x sessions). I can categorically say this was probably the most beneficial part of the plan — the dunes that we are running up and down were constantly undulating, and I felt so strong being able to keep momentum going because of this. Running, or I should say, shuffling is easier than pure walking, as you lose all momentum and sink downwards. I was able to keep this going to glide along because of these reps.
Single leg and core work in the gym — core strength was super important, keeping yourself stable especially with the pack and water weight and not letting your running form degrade was key to remaining uninjured and mobile.
Tune up races (Pilgrims Challenge) — explained above.
Training camp in the Canary Islands — warm weather and terrain specific training.
Hilly days focussing on ascending and descending.
Undulating days and pure sand days.
Practice fuelling and hydration — in kit, on tired legs, repeatedly.
What did you learn from it?
The biggest thing I take away from this, is to not set artificial boundaries on yourself based on what you currently know. Train for the events you want to do, not what you think you can do. There were people of all ages and shapes and sizes — this is a mental game rather than physical. Yes, there is a high base level of fitness and strength needed, but it’s what is going on in your head that separates people from succeeding. All of this extends far beyond running and into my personal life as well — why would I ever sell myself short or think I can’t do something? That doesn’t come from a place of arrogance, but a place of confidence knowing that my absolute worst case scenario is that I learn something.
The key message
Life is too short. Just do the thing.
Want this built into your plan?
MdS, ultras and the training that fits real life — that is run coaching at RIAK. Book a free consultation or email us.
~840km · Soria, Spain · multi-day gravel · pairs winner
Where do I begin?
For a while, I had been on the lookout for a challenge that would genuinely test me. I’ve watched a lot of YouTube videos of people taking on ultras and wondered what makes someone decide to scratch. It’s easy to think you’re mentally resilient when you’re sitting at home watching someone else go through it. It is very different when you are actually there, on day three, running on very little sleep, under-fuelled, uncomfortable and looking at your Garmin telling you there is “only” another 100km to go.
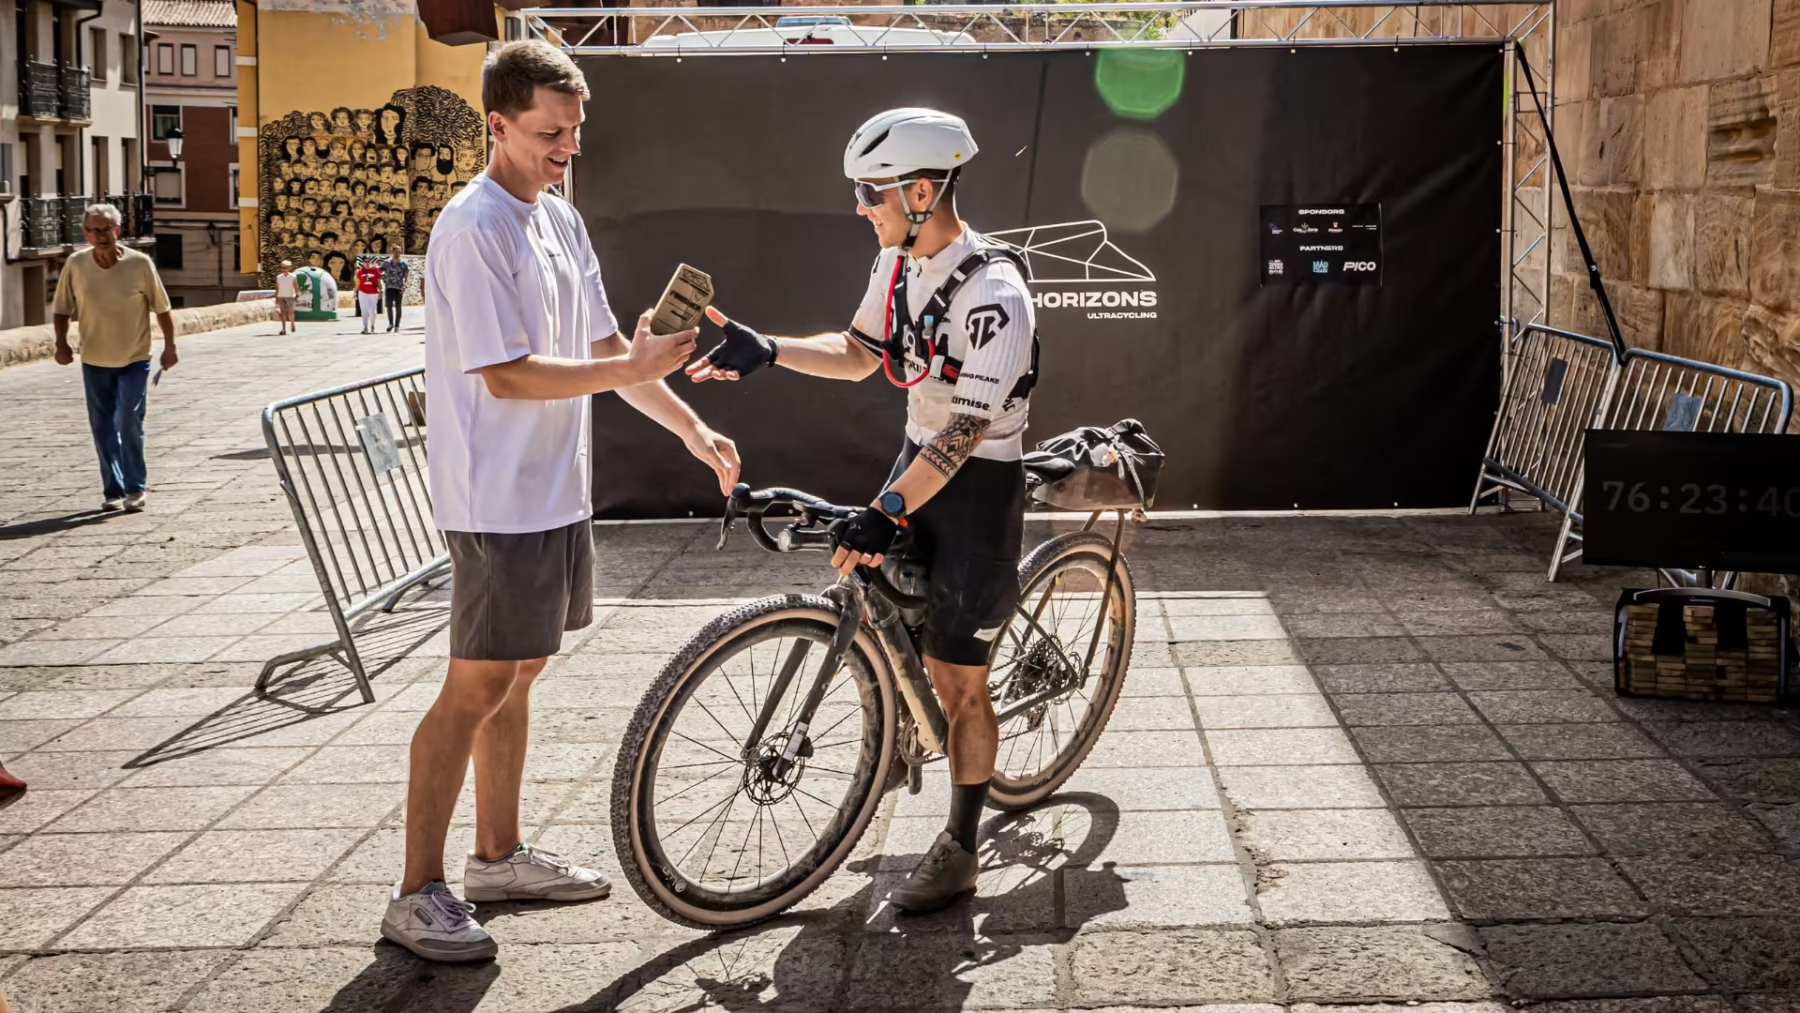
That was Lost Horizon.
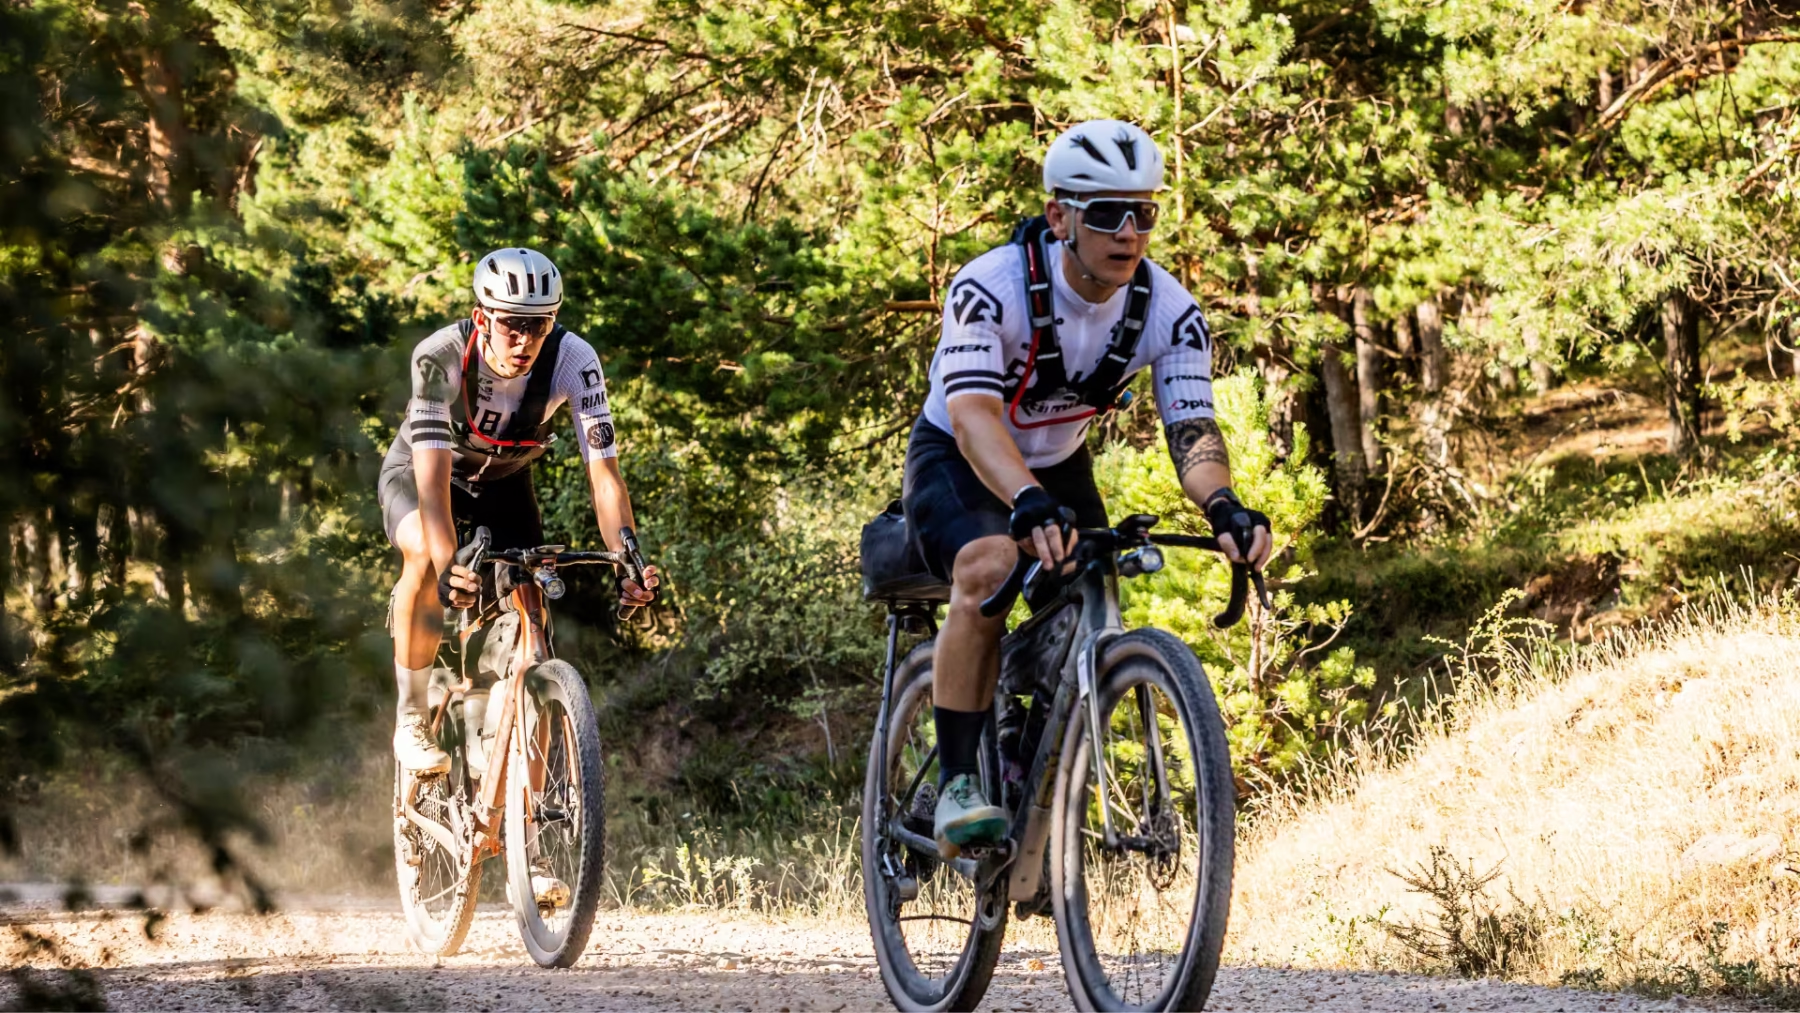
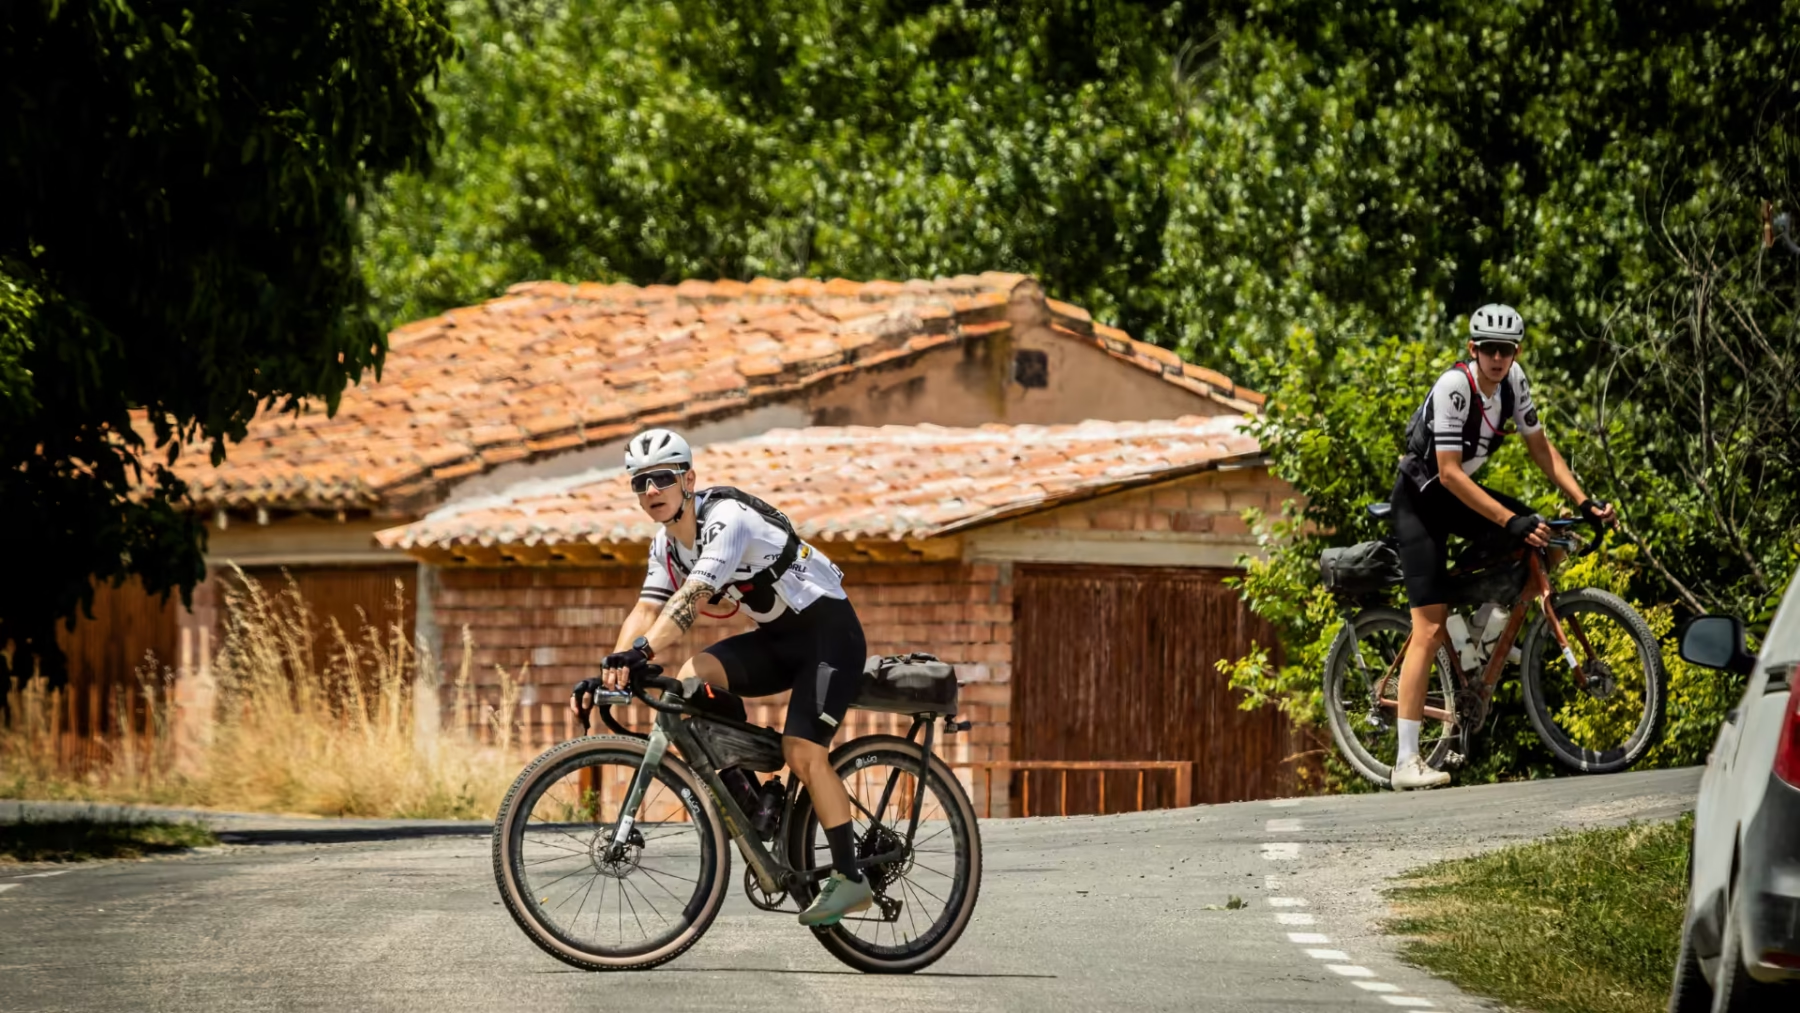
Around 840km of Spanish gravel through the province of Soria, starting and finishing in the city itself. Soria is a beautiful but sparsely populated part of Spain and that remoteness is a huge part of what makes the event so special. You can ride for KM after KM on almost perfect gravel, surrounded by rolling hills, forests, mountains and huge golden cereal fields. At times, the landscape genuinely felt more like Tuscany than what I had imagined northern Spain would look like.
And that is one of the things I discovered about ultra cycling. I realised it isn’t just about getting to the finish. It is everything that happens along the way.
The goal and the plan
Before Lost Horizon, my ambition was fairly simple: complete my first ultra and try to do it within three days.
Rich knew that was the goal and, as he has done with quite a few of my slightly questionable cycling ambitions, he never tried to talk me out of it. Instead, he helped me work backwards from what I wanted to achieve and broke what initially looked like a fairly ridiculous challenge into something manageable. Lost Horizon was probably the biggest test of that preparation so far.
Distance
~840km
Spanish gravel through Soria — start and finish in the city.
First ultra target
3 days
Finish the event within three days on the debut attempt.
On the road
Day one started in Soria at 7am and, initially at least, everything went pretty much to plan. The legs felt good, the fitness was there and I was able to settle into the event.
As the kilometres accumulated, however, I began to understand that an ultra is about far more than how many watts you can produce.
You can have the best plan possible before the start, but the reality is that almost nothing goes completely to plan. You arrive somewhere after the shops have closed. A planned refuelling stop disappears. You haven’t eaten enough. You sleep less than expected. Saddle sores become increasingly painful. Something that seemed insignificant six hours earlier suddenly becomes the only thing you can think about.
Then you adapt and keep moving.
By day three, the physical challenge had almost become secondary to the mental one. You are tired, sleep deprived and under-fuelled, and every little problem becomes magnified.
That was probably the biggest thing Lost Horizon taught me. You cannot fully prepare someone for the mental side of an ultra. Until you have experienced being that tired and uncomfortable and still having to make the decision to get back on the bike and continue, it is very difficult to understand what it feels like.
What the coaching delivered
What Rich could prepare me for was the physical side of it.
And the biggest compliment I can give him is that my fitness never let me down. At no point during the event did I feel under-trained or think that I wasn’t physically capable of completing it. My legs weren’t the limiting factor. After hundreds of kilometres of riding, that gave me enormous confidence because however difficult things became, I knew the underlying fitness was there.
That is entirely down to the preparation.
The things that tested me most were the things that are almost impossible to recreate in training: cumulative sleep deprivation, missed fuelling stops, saddle discomfort and the psychological effect of knowing you still have hours and hours left to ride.
In a strange way, those are also the reasons I came away wanting to do another one.
Ultra cycling pushes you so far outside your normal comfort zone that you learn a lot about yourself very quickly. It teaches you to solve problems when you are exhausted, to stop worrying when the original plan falls apart and to become adaptable enough to keep finding a way forward.
And it takes you to places you would otherwise probably never see. Roads and trails you wouldn’t think to drive, and places that would take days to reach on foot. For hours you can have nothing around you except your bike, the landscape and the route ahead.
There is something pretty special about that.
The key message
I went to Soria looking for a challenge that would test me physically and mentally. I definitely found it.
I also came away knowing that physically I had been as well prepared as I could have been. For that, I owe a huge amount to Rich.
The problem for him now is that completing my first ultra hasn’t got it out of my system.
Quite the opposite. I am already wondering what ridiculous challenge I can give him to prepare me for next.
Want this built into your plan?
Gravel ultras, audacious goals and training that fits real life — that is cycling coaching at RIAK. Book a free consultation or email us.
Coming back from illness can be a very frustrating process and really does take discipline. Ultimately your goal is to minimise the amount of time you are unable to perform high quality training. We emphasise this because being on a bike and unable to hold power or running whilst coughing your guts up is not high quality training. Sometimes, you have to take more recovery in order to reduce the overall length of time you are unable to train with purpose.
When to train and when not to train
Each illness is different and the introduction of COVID into the pantheon of bugs out there has added an extra layer of complexity. As a general rule though:
– If the illness remains above the head (i.e. just a snotty nose and a bit bunged up), you are probably okay to train but it must be kept low intensity. This means Zone 2 maximum or a 3-4/10 RPE. Using your heart rate to manage this can also help keep the ego at bay.
– If the illness has gotten into your chest (i.e. phlegmy cough), do not train.
There is zero benefit to exericsing when you are not right to do so. All it will do is exacerbate the symptoms with increased or prolonged respiratory immflamation or could lead to more serious complications, for example, a chest infection requiring a course of antibiotics.
Another cue for knowing whether to train or not, is simply whether you are umming and arring about whether to do so. The likelihood is, you are a highly motivated individual and therefore, if you are questioning whether to train, the chances are that you are not ready. We are pretty good at getting the right signals from our bodies, but often the ego can see us ignore those signals.
Once you are ready, how to approach your return to training
So let’s assume you have been sensible about it and either your illness has not progressed into the chesty cough phase, or you have passed through it and are out the other side of it. In these instances, we suggest a 3-5 day return to training protocol:
Day 1 – 30-minutes of very low intensity (Zone 1: 1-2/10 RPE) training. See how your body responds over the next 6-hours or so. If you experience no adverse reaction, then move on to day 2.
Day 2 – 45-minutes of low intensity training (Zone 2: 3-4/10 RPE). Again, no reaction from your body, move to day 3.
Day 3 – 60-minutes of low intensity training (Zone 2: 3-4/10 RPE). No reaction from your body? Move to day 4.
Day 4 – 60-minutes of low intensity training, but this time, throw in a few higher intensity efforts circa 8/10 RPE. You might have a bit of a tight chest but as long as you don’t get a return of phlegm to your chest, move on to Day 5
Day 5 – Return back to your normal training schedule but be mindful that your chest will likely be a bit tight for another week or so. So, be kind to yourself and don’t stress if your numbers aren’t immediately good again. We would suggest largely relying on rate of perceived exertion and heart rate during this period, rather than objective metrics such as power.
The above is a very general protocol and the circumstances really determine how applicable it is. In our opinion though, if you get ill, we would suggest trying to accept from the beginning that you are looking at probably at least 2-weeks of recovery (1-week completely off, 1-week going through the above protocol), before you are back to quality training again. Managing your expectations in this way can help to avoid making silly decisions that set you back.